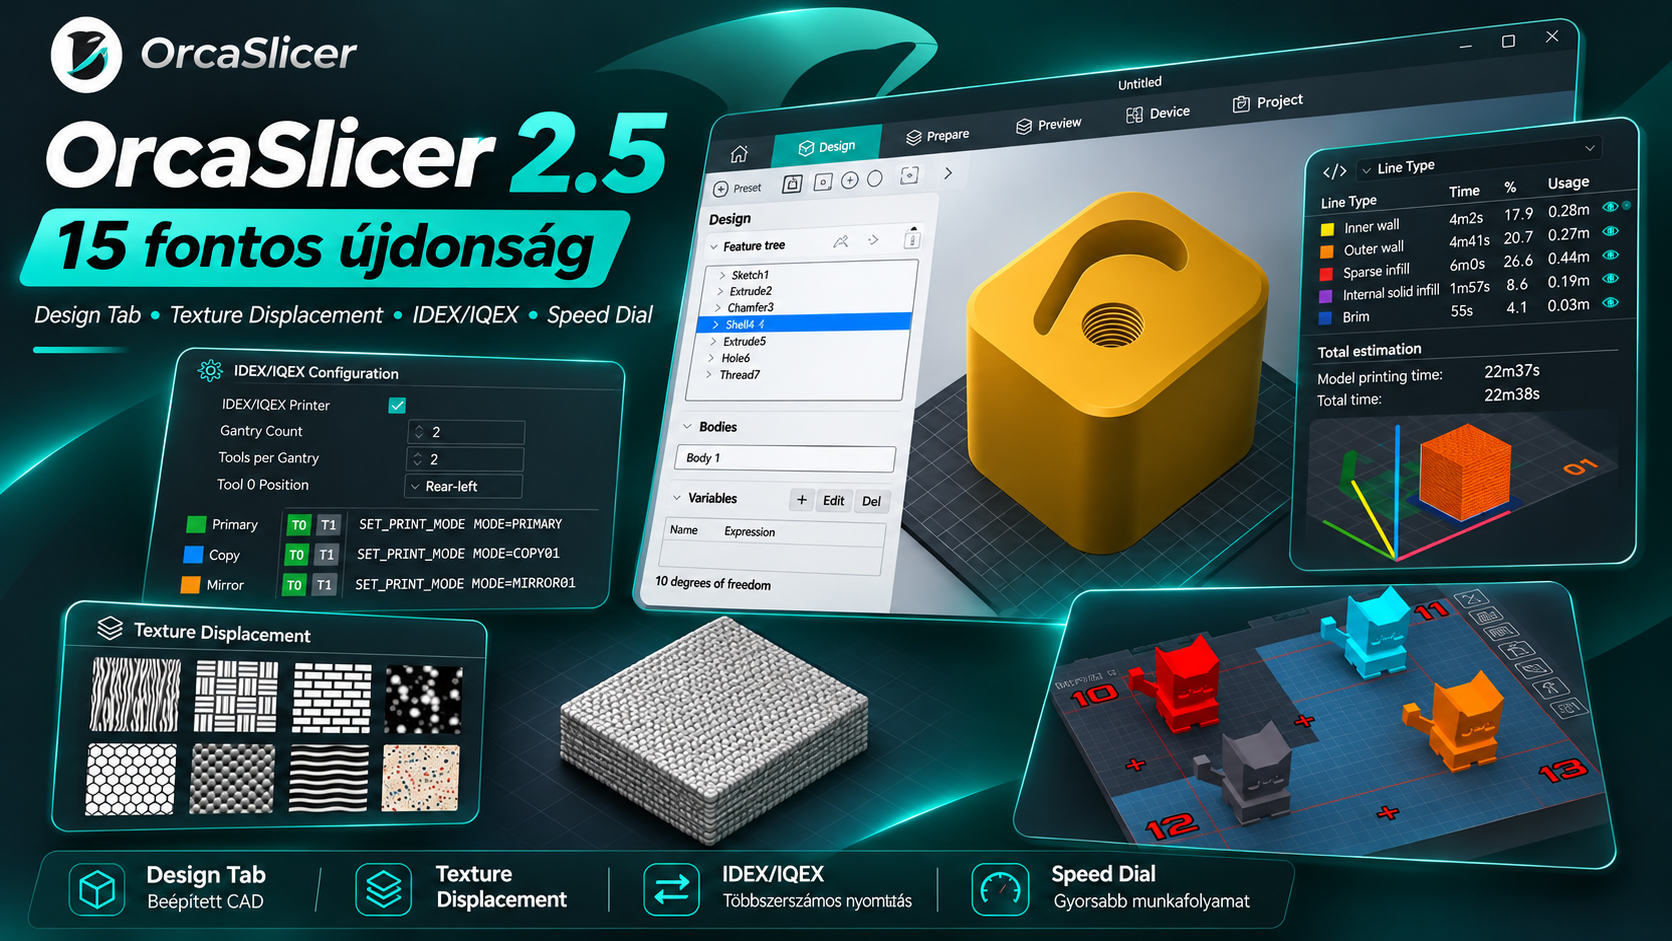
OrcaSlicer 2.5: 15 major features explained in a technical deep dive
Python plugins, built-in CAD, color mixing, shared 3MF settings, precise seams and IDEX/IQEX. All 15 chapters of The Next Layer video crosschecked against official OrcaSlicer release notes, plus the 2.5.1 fixes.
OrcaSlicer 2.5 is more than a routine slicer update. The Next Layer published an approximately 21-minute walkthrough on November 19, 2026, covering 15 major capabilities. This 3DPS deep dive follows every public video chapter and crosschecks the technical behavior against OrcaSlicer’s own release documentation: where the workflow truly changes, what matters for multi-tool machines, and which capabilities remain experimental.
According to the project’s release announcement, 2.5.0 incorporated nearly 1,300 pull requests from more than 180 contributors. We also cover the current 2.5.1 maintenance release, published on November 14, 2026, which addresses connectivity, slicing, crashes, and security issues.
Editorial methodology: the 15 chapter names and timecodes come from the video’s public chapter listing; technical behavior is grounded in official OrcaSlicer release notes. Engineering implications are 3DPS editorial analysis, not independent benchmark results.
Video: all 15 features
Watch the original video on The Next Layer
All 15 chapters with direct timestamps
- 00:51 – Python plugins: OrcaSlicer becomes a platform
- 04:15 – Design tab: parametric CAD inside the slicer
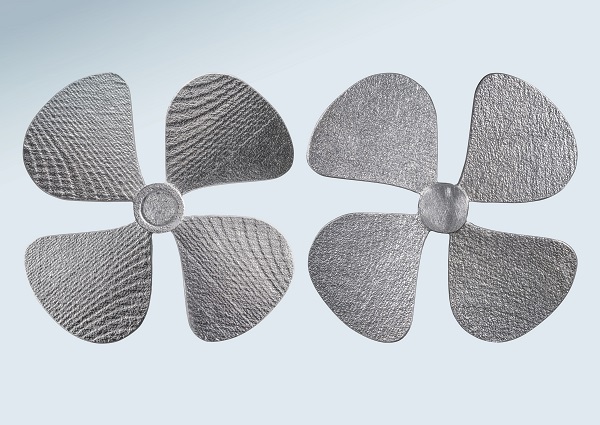
- 05:20 – Texture Displacement: genuine printed surface relief
- 05:58 – Color Mixing: new colors from alternating thin layers
- 06:28 – Importing models that already contain color
- 07:38 – Publish 3MF: sharing settings without replacing profiles
- 09:45 – Speed Dial: a command palette for slicing work
- 10:19 – Section and X-Ray views: look inside geometry
- 11:27 – Precise Seam: placing the Z-seam exactly where intended
- 12:20 – Top Surface Expansion: more coherent top skin
- 13:08 – Adaptive Density Infill: dense shell, lighter core
- 13:59 – Different nozzle sizes within one job
- 14:58 – Filament for Features: materials assigned by feature
- 15:50 – Belt printer support: slicing for a moving build surface
- 17:01 – IDEX and IQEX: synchronized copies and mirror printing
Detailed engineering analysis
01. Python plugins: OrcaSlicer becomes a platform
Video chapter: 00:51
The most strategic change in 2.5 is its Python plugin architecture. Developers no longer necessarily need to maintain a fork and a custom build. Local .py or .whl packages can add commands, docked interfaces, tabs, and processing stages to the slicing workflow. OrcaSlicer ships a Python runtime and manages plugin dependencies.
The Slicing Pipeline capability goes beyond UI customization: a plugin can inspect or alter sliced layers, extrusion paths, and even exported G-code. That opens meaningful opportunities for experimental toolpaths, industrial material workflows, and unusual printer architectures, but also creates a need for controlled testing, versioning, and change review.
Security caveat: permission prompts guard access to the network, external processes, and files outside the application data folder. The maintainers explicitly caution that permissions are not a sandbox. Unverified plugins should not go straight onto production equipment.
02. Design tab: parametric CAD inside the slicer
Video chapter: 04:15
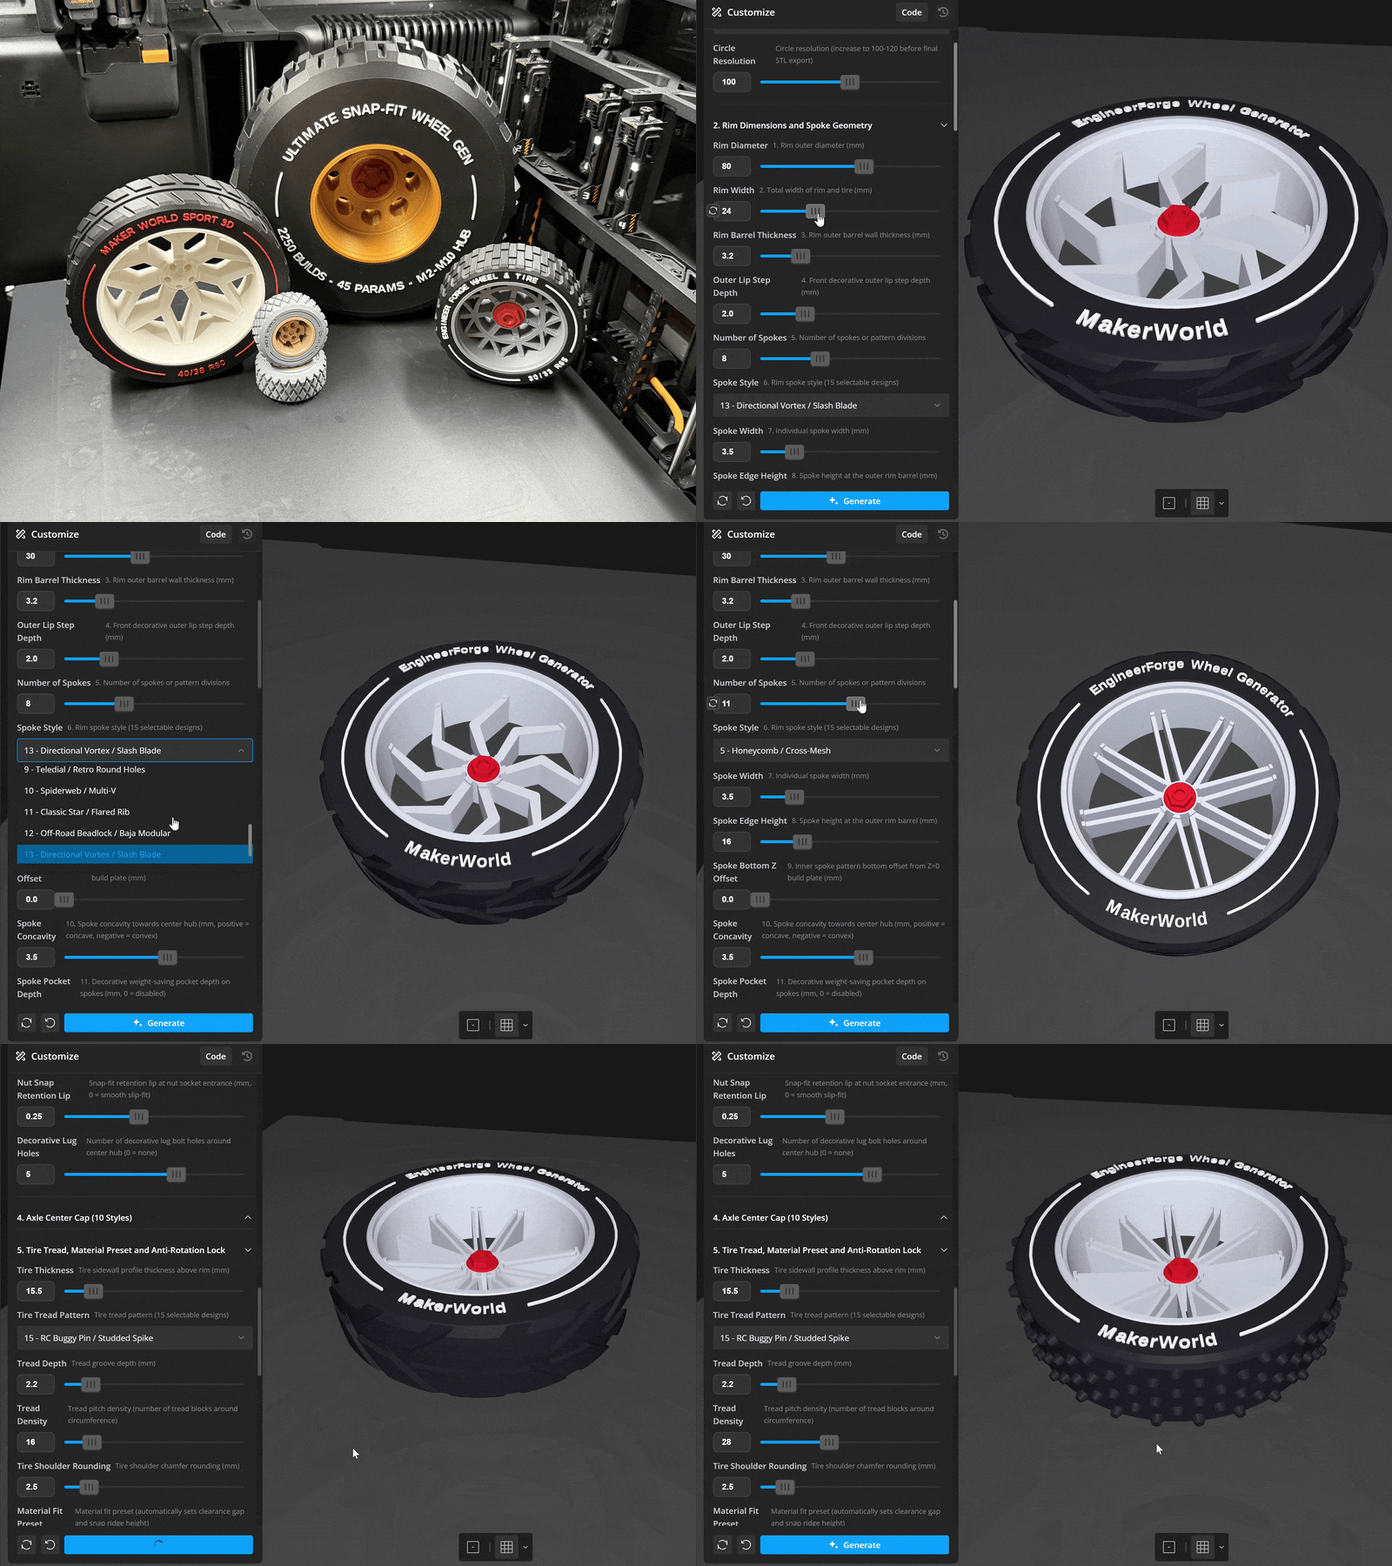
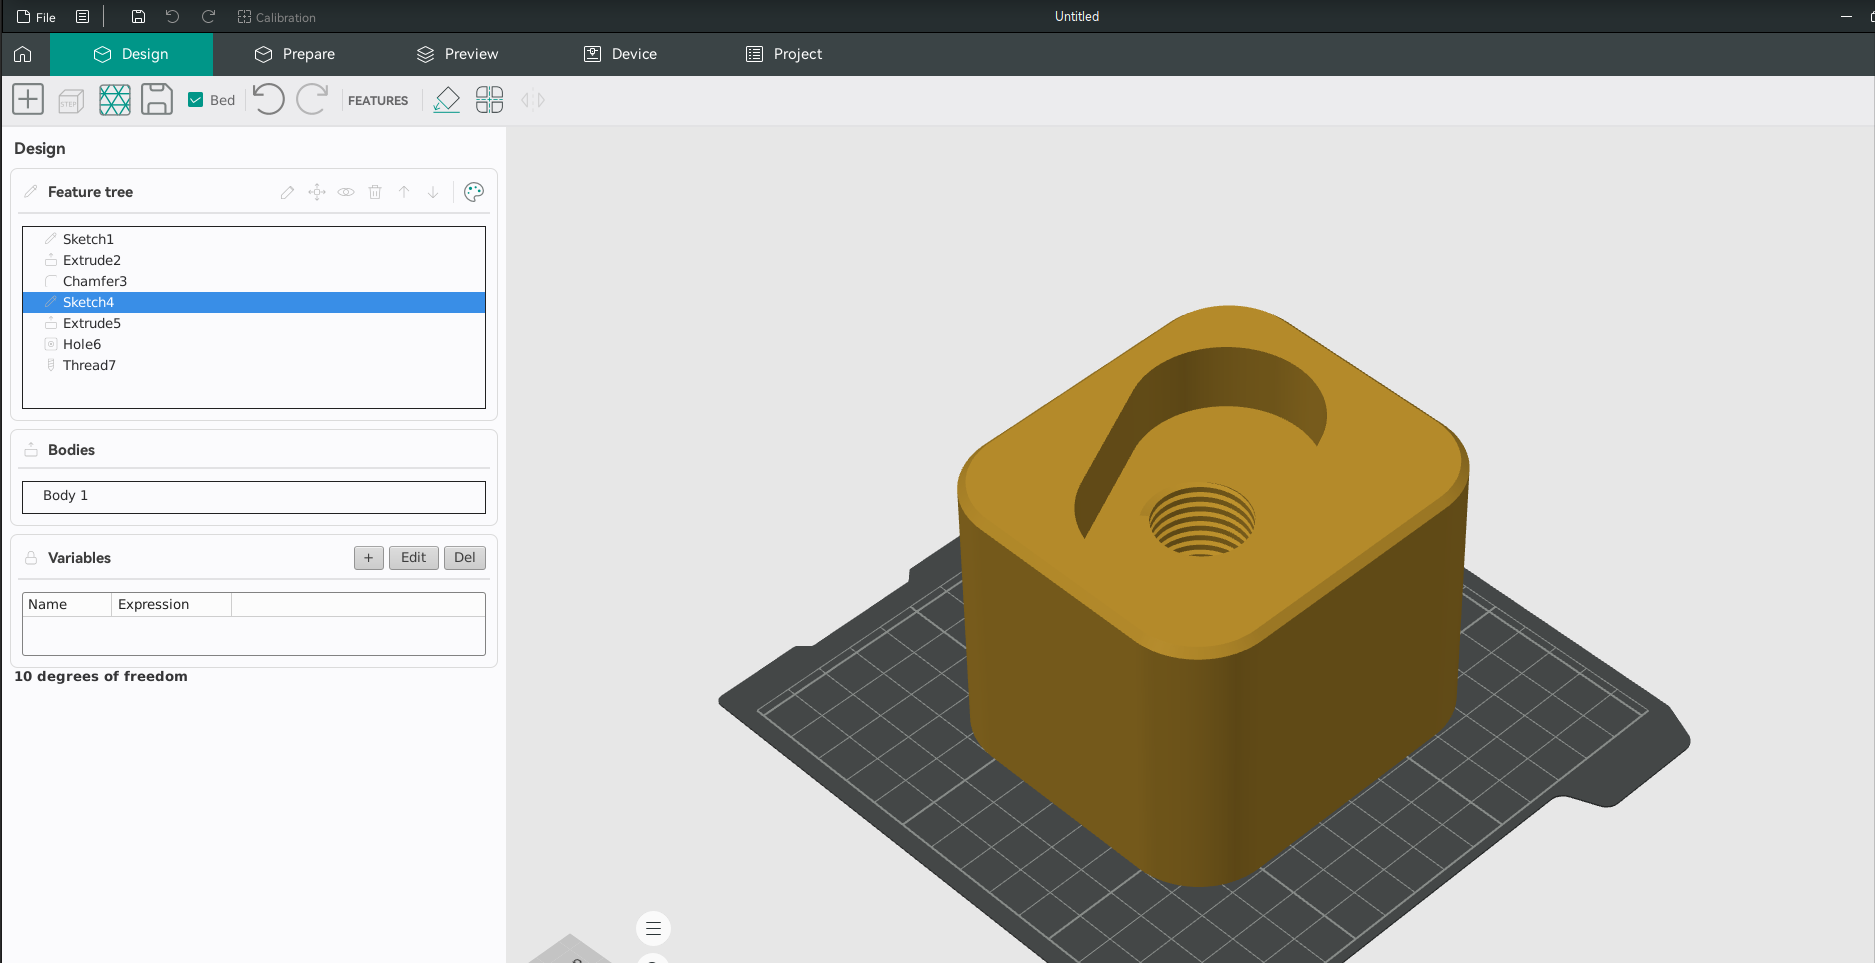
The experimental Design workspace introduces sketch-driven parametric modeling: dimensions, geometric constraints, Extrude, Revolve, Sweep, Loft, holes, modeled threads, fillets, and an editable feature history. That history is stored in the 3MF project rather than being flattened into an STL mesh.
Enable Preferences → General → Features → CAD feature (experimental) and restart. STEP can be imported as solid geometry; Commit to Plate passes the result to Prepare. This could streamline brackets, spacers, and shop-floor fixtures, but it should not yet be treated as a fully mature replacement for dedicated CAD systems.
Engineering caution: it remains experimental. Save editable project backups and STEP exports, then verify tolerances, orientation, and final geometry in the sliced preview.
03. Texture Displacement: genuine printed surface relief
Video chapter: 05:20
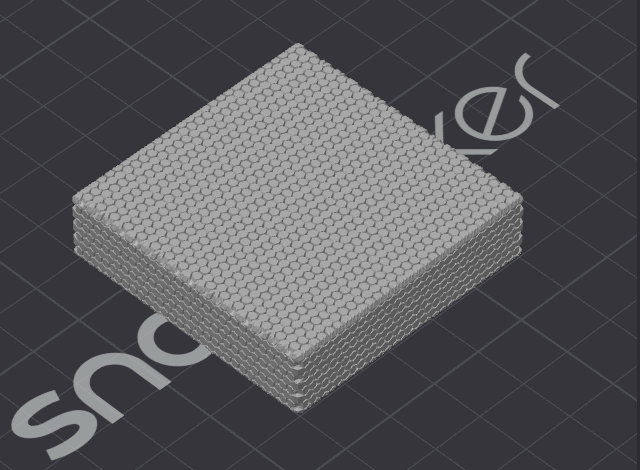
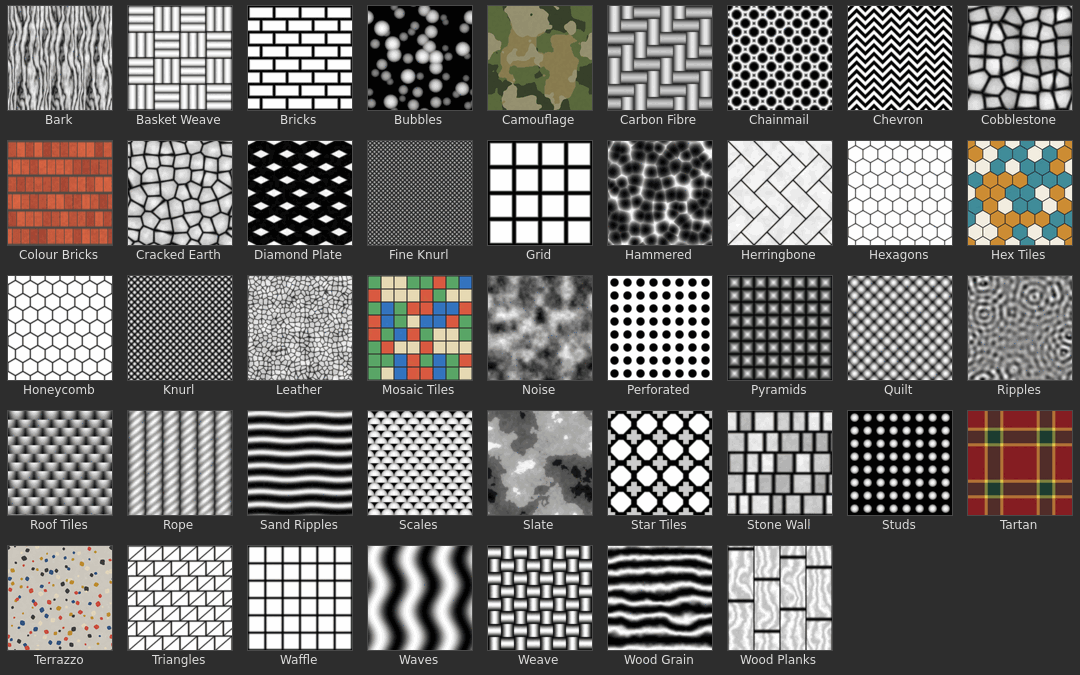
Texture Displacement converts images and patterns into real surface geometry. Users paint a region, choose one of 40-plus built-in textures or import a height map, specify depth and tile size in millimeters, and Bake the effect into the actual mesh.
Unlike random Fuzzy Skin, the result can be a controlled repeating relief: knurling, grip texture, brickwork, or wood grain. Color textures can also contribute color painting, potentially using the new filament-mixing workflow.
Resolution remains limited by nozzle size and layer height. Dense texture raises triangle counts, processing cost, and potentially print time, so a small material test coupon is advisable.
04. Color Mixing: new colors from alternating thin layers
Video chapter: 05:58
Color Mixing combines two or three loaded filaments of the same material type into a virtual mixed-filament slot. This is not molten pigment mixing inside one nozzle: the perceived new color comes from thin alternating printed layers. The Mixed color sublayer setting refines those sublayers for smoother optical blending.
The outcome depends heavily on translucency, layer thickness, surface geometry, and lighting. It is promising for gradients and decorative parts but should not be described as automatically color-calibrated CMYK printing.
Time and material overhead still depend on how the printer changes materials. Compare estimated purge mass, prime-tower use, and tool-change count against single-color and conventional multicolor versions.
05. Importing models that already contain color
Video chapter: 06:28
OrcaSlicer 2.5 expands color-aware model import, reducing the manual work that previously accompanied textured or color-bearing models. The importer can simplify a model's palette to a chosen number of colors and map those colors to filaments in the project.
Automatic matching can also create virtual mixed-filament slots where suitable. This is significant for creators using textured OBJ assets, yet an on-screen match is not a guarantee of a colorimetrically accurate physical print.
Check small details, the palette limit, and the actual number of materials a particular printer can process before assuming a complex colored model will print as previewed.
06. Publish 3MF: sharing settings without replacing profiles
Video chapter: 07:38
Publish 3MF allows creators to share a model with selected printer, filament, and process settings without overwriting recipients' entire local presets. Choose File → Publish 3MF and decide which values travel with the file; deviations from existing presets are preselected.
The recipient opens a new untitled project, keeps their own profiles, and receives warnings for settings that cannot be applied. This is a meaningful improvement for published maker designs, professional recipe sharing, and troubleshooting prints that behave differently between workstations.
It is still a shareable recipe, not a guarantee of identical prints: nozzle, actual material, cooling, and machine condition matter.
07. Speed Dial: a command palette for slicing work
Video chapter: 09:45
Speed Dial is a searchable command launcher opened with Space when not typing in a field. It can jump to settings, slice, open projects, start calibration, manage plates, and execute plugin actions from one interface.
Commands remain searchable by their English names even under a translated UI, helpful when following English tutorials. This changes navigation efficiency rather than the fundamental G-code generation algorithm.
Shared naming habits and common commands can make a lab with multiple operators noticeably easier to run.
08. Section and X-Ray views: look inside geometry
Video chapter: 10:19
Section uses a moveable cutting plane to inspect model interiors in Prepare and toolpaths in Preview. X-Ray draws surfaces transparently so overlapping internal geometry can be seen. One provides a controlled section; the other lets you look through objects.
Assemblies, hidden channels, cavities, supports, and complicated internal toolpaths become much easier to inspect without creating an extra sliced mesh solely for inspection.
These are view tools: using them does not itself modify the model or generated G-code. They do not replace dimensional validation.
09. Precise Seam: placing the Z-seam exactly where intended
Video chapter: 11:27
Precise Seam uses dedicated modifier geometry to determine the seam position where that geometry intersects the object's outer wall. It goes beyond nearest/back or painted preferences by defining a more exact location across affected layers.
Three strong modes (Center, Left, Right) and three preference-oriented modes (Enforced, Blocked, Neutral) are available. As the modifier stays separate from the main mesh, it can survive model edits without requiring an entirely new seam-painting session. This matters for consumer-facing covers, presentation surfaces, and controlled assembly edges.
An exact seam position does not ensure an invisible seam: pressure advance, retraction, wipe, and cooling still determine the physical result.
10. Top Surface Expansion: more coherent top skin
Video chapter: 12:20
Top Surface Expansion grows top-skin regions by a specified distance. Raised text, bosses, and overlapping pieces can otherwise interrupt a top pattern, leaving little holes and cosmetic discontinuities.
The new setting can connect those regions; Top expansion wall margin keeps the expansion away from the outside perimeter to avoid a visible ridge. The growth direction can be configured.
This is not a universal strength multiplier. Its main value often lies in cleaner, more continuous visible skin and better support beneath upper layers. Review the Preview to ensure expansion does not become excessive.
11. Adaptive Density Infill: dense shell, lighter core
Video chapter: 13:08
Experimental Adaptive Density grades Gyroid, TPMS-D, and TPMS-FK sparse infill according to the part's geometry. It keeps the required density near walls and outer shells, then reduces it toward an Interior density in the core. Distance-, cross-section-, and lobe-based transition methods are provided.
The idea is to save material and print time without equally reducing support immediately under top surfaces. Results depend on geometry; some load directions may become weaker, and the developers still label the option experimental.
For structural or safety-relevant parts, validate deflection, layer bonding, and repeated-load performance on printed test pieces. Slicer percentages are not a mechanical design verification.
12. Different nozzle sizes within one job
Video chapter: 13:59
On supported multi-nozzle printers — the official notes specifically name the Bambu Lab H2D and X2D — OrcaSlicer 2.5 can assign different nozzle diameters to left and right tools. An illustrative setup uses 0.2 mm for fine outer detail and 0.8 mm for higher-throughput internal work.
Line widths, infill, support paths, and ironing are computed from the nozzle that actually extrudes each feature. That can remove part of the usual detail-versus-throughput compromise.
This is not universal compatibility. Correct printer profiles, tool calibration, material assignment, and firmware support are essential. A visible UI setting does not by itself make an arbitrary printer multi-nozzle capable.
13. Filament for Features: materials assigned by feature
Video chapter: 14:58
Filament for Features lets users choose materials for selected structural features rather than assigning one filament to every part of an object. In 2.5 an important semantic change makes a feature left on Default always inherit that object's own filament.
This prevents subtle propagation of an explicit filament choice into unrelated features. It matters in multimaterial work, especially when soluble support interfaces, decorative top surfaces, or material-specific internal regions are involved.
After upgrading, reslice older 3MF projects and inspect the per-filament paths: previously implicit assignments may yield different toolpaths even though the model has not changed.
14. Belt printer support: slicing for a moving build surface
Video chapter: 15:50
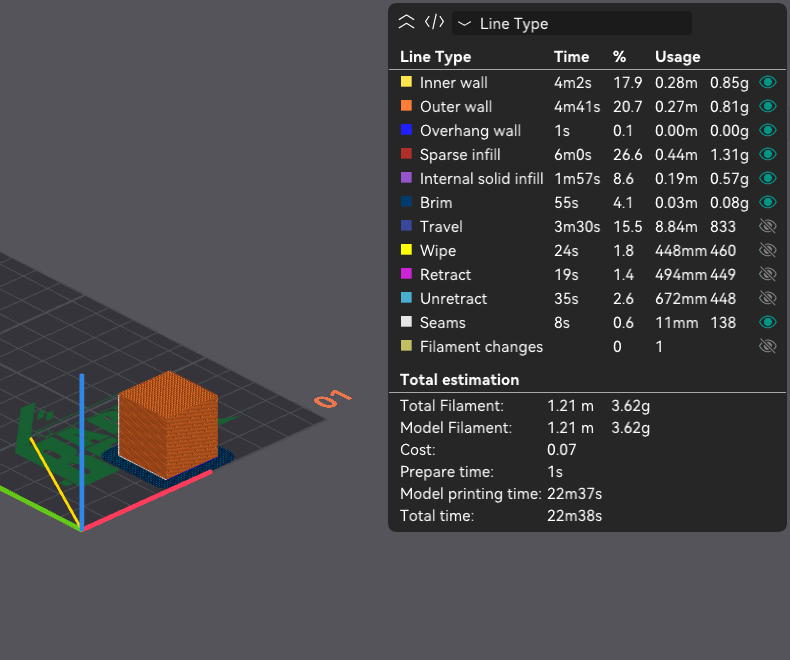
Belt-printer slicing is now part of the standard OrcaSlicer build. A continuously moving build surface and typically inclined layer geometry require a different coordinate transformation from a conventional fixed build plate — it is more than simply an extra-long Z axis.
Users can inspect the designed part and the transformed raw G-code view. Generic and selected ready-made belt-printer profiles are included, and the separate belt-only nightly build is no longer necessary.
Limitation: belt adhesion, nozzle angle, and automated part release remain mechanical challenges. Software support does not turn a regular Cartesian printer into a belt printer.
15. IDEX and IQEX: synchronized copies and mirror printing
Video chapter: 17:01
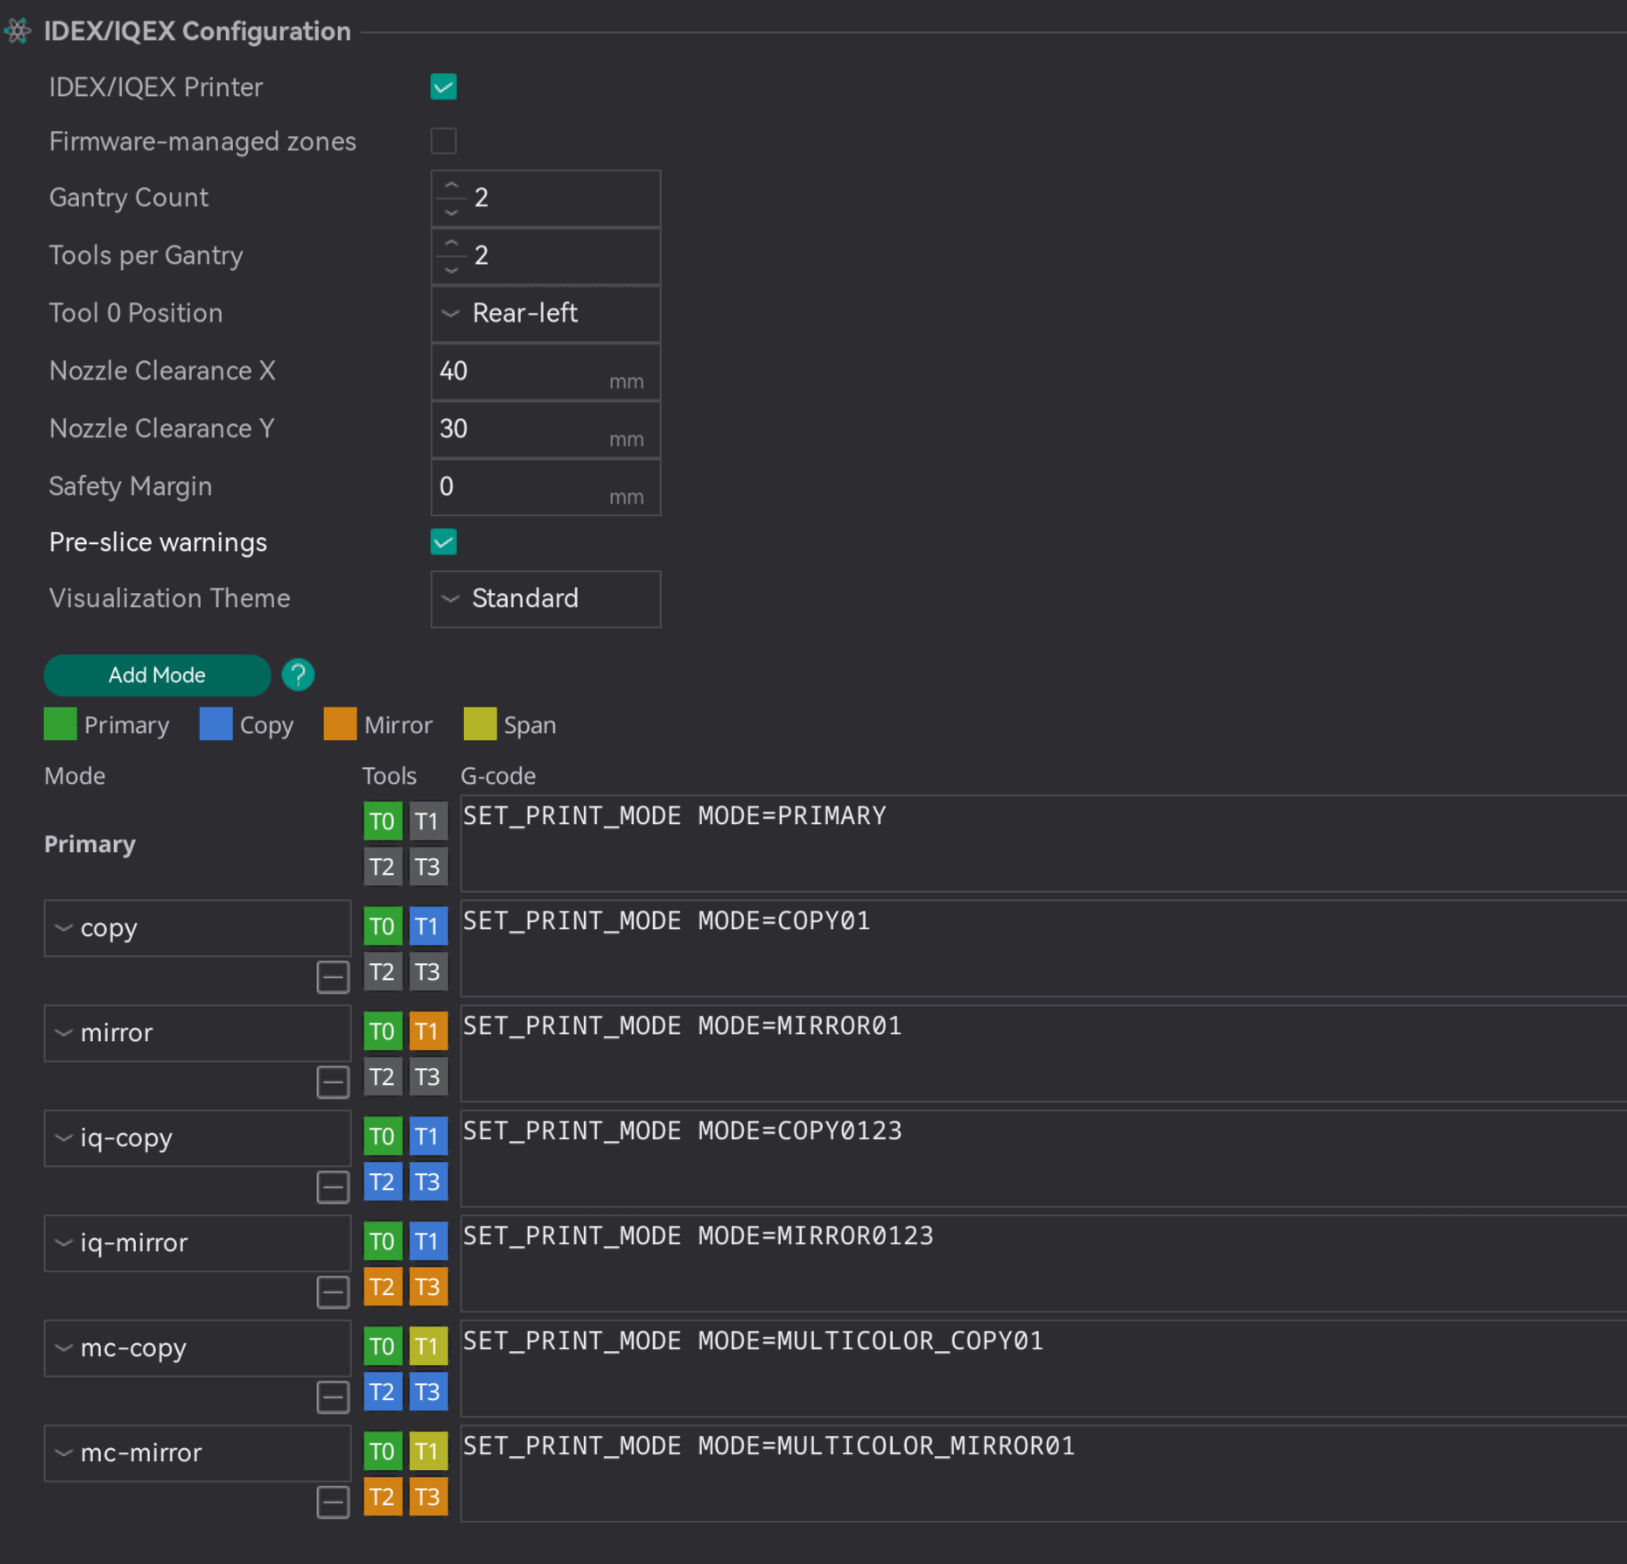
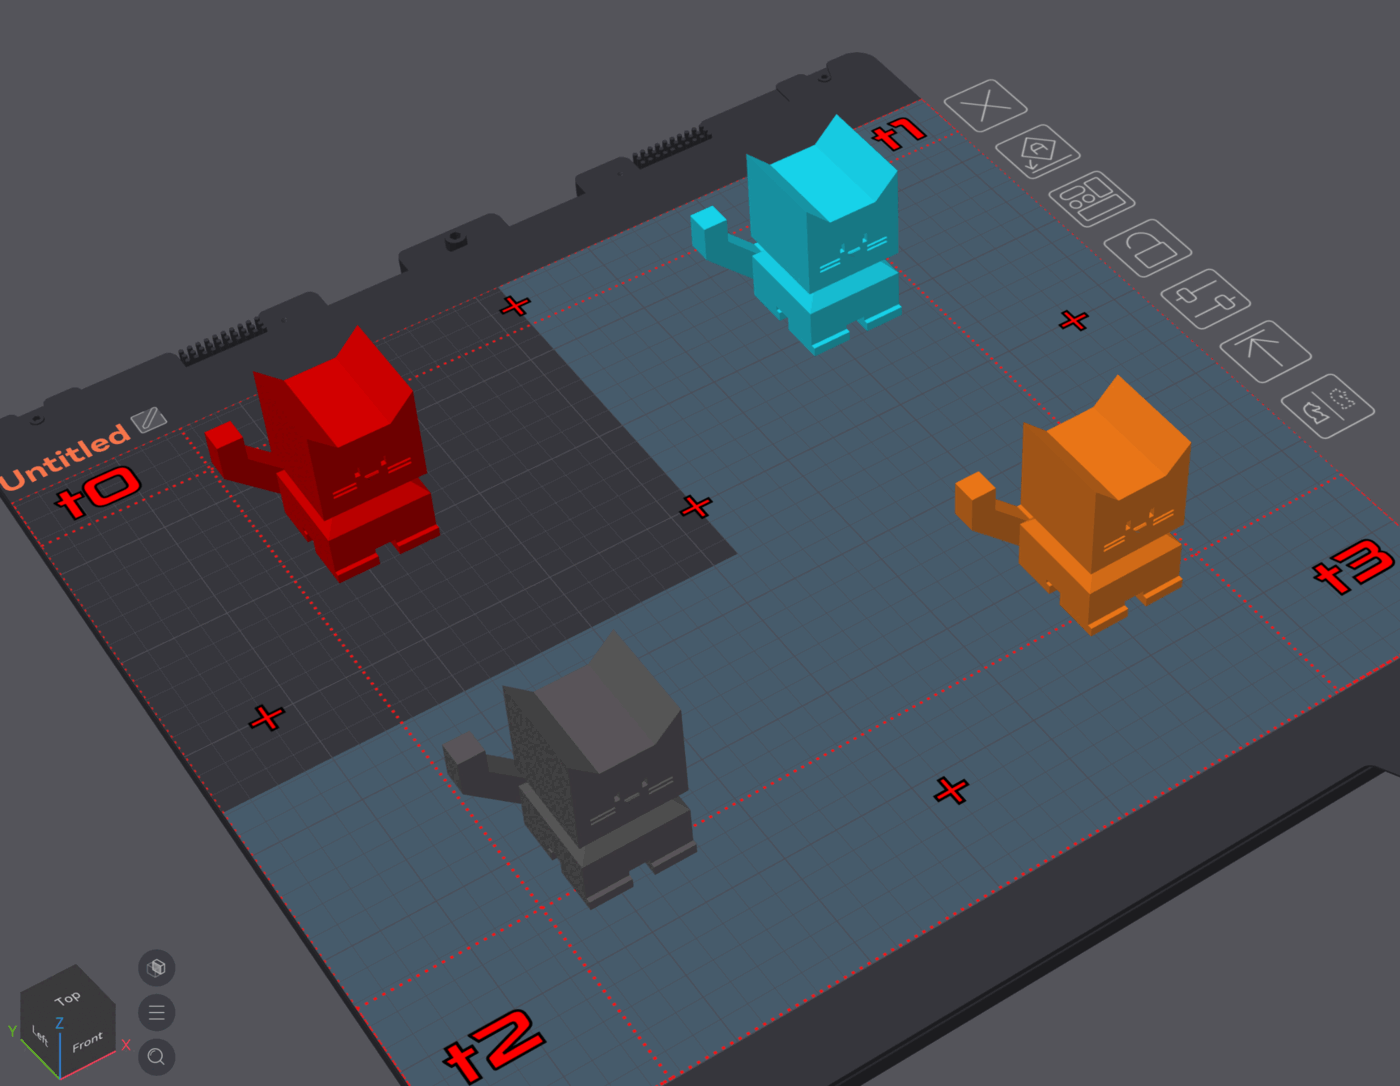
The new parallel iXex printing targets machines with independently moving carriages: IDEX, dual-gantry, and selected IQEX arrangements. OrcaSlicer can produce several synchronized copies or mirrored parts from one sliced design while accounting for carriage clearance zones.
The profile must define gantry/tool arrangement, carriage roles, clearances, and firmware G-code to select the mode. Preview shows ghost copies, and the official notes describe configuration for Klipper, RepRapFirmware, and Marlin 2.
Do not confuse parallel printing with switching between four fixed-color nozzles. The purpose is concurrent part production, and it requires genuinely independent carriage motion. Validate firmware modes and collision zones safely before live production.
Beyond the 15: other important official engineering changes
The official 2.5 notes include changes beyond the video’s main list that matter in production. Toolhead Collision Volumes model clips, tool docks, and other protrusions as spatial obstacles so arranging, selected brim/support paths, and travel moves can avoid them. The G-code checker cannot see motion hidden inside firmware macros.
A redesigned travel planner also shortens non-printing moves. Developer benchmarks reported 6–26% less travel and 1–6.5% shorter estimated print time on certain test plates, but one dense model actually became slower due to additional retractions. These are model-dependent developer benchmarks, not universal production guarantees.
The release also improves Klipper time estimation by modeling aspects of its motion planner. Stable 2.5.0 fixes needless M400 pauses above the purge tower on Klipper printers—especially relevant in tool-change-heavy jobs.
2.5.1: which version should you install?
As of November 21, 2026, 2.5.1 is the latest official stable release. Released November 14, it fixes crashes, upload and printer-connection problems, and security issues including an XML-processing edge case, bundled plugin package tooling, and TLS CA-file handling for LAN devices.
It also allows copying per-nozzle settings across more than two tools. Users who selected a custom CA file for a Bambu LAN connection before 2.5.1 may need to select it again, according to the release notes.
Download only from verified official sources: orcaslicer.com/download and GitHub v2.5.1 release. The OrcaSlicer maintainers specifically warn about deceptive similarly named download websites.
Practical upgrade checklist
- 1. Back up presets: export printer, filament, and process profiles and preserve a known-good 3MF benchmark project.
- 2. Compare like for like: slice the same model and filament in both versions; record estimated duration, filament mass, and tool-change count.
- 3. Inspect Preview: review seams, top skin, infill, purge paths, travel, and collision clearance.
- 4. Match firmware: on Klipper, check square_corner_velocity, acceleration, G-code macros, and nozzle offsets against the machine configuration.
- 5. Introduce incrementally: test experimental CAD, plugins, and adaptive infill on disposable samples before customer production.
Video creator and verified public contact channels
The video was published by The Next Layer. Its official About page identifies Jonathan Levi as founder and editor; the site and media kit also name Next Layer Media, LLC. for business contact. The channels below are linked from the creator’s own site, the video description, or the official media kit. Discord invitation redirects can change over time.
- Official website: The Next Layer
- YouTube channel: @thenextlayer
- Business email: partnerships@thenextlayer.com
- Contact form: thenextlayer.com/contact-us/
- Sponsorship kit: sponsor.thenextlayer.com
- Community support: patreon.com/thenextlayer
- Creator-posted invitation: jle.vi/tnl-discord
- Creator-linked profile: @jonathanalevi
- Shop: shop.thenextlayer.com
- Business meeting link: jle.vi/meet-30
The publicly linked media kit also lists Discord: jonathanalevi and WeChat: wxid_fcwca5lfuyq812, copied from the published business contact section rather than guessed from social searches. The official contact page publishes the company mailing address: Next Layer Media, LLC., 30 N. Gould St, Suite N, Sheridan, WY 82801, USA. This is a company mailing address, not a private home address.
We could not reliably associate an Instagram account, TikTok profile, or direct personal telephone number with this particular creator using self-published verification, so none are invented here. Similarly named “Next-Layer 3D Print LLC” accounts should not be conflated with Jonathan Levi’s channel.
3DPS engineering verdict
The largest shift in OrcaSlicer 2.5 is not an individual support pattern. The application is moving beyond the conventional import–configure–slice workflow toward CAD, extensibility, reproducible project sharing, and machine-aware multi-tool production. For everyday users, Speed Dial, Precise Seam, richer inspection, and shorter travels may deliver immediate benefits. The longer-term impact could come from Python plugins and specialized multi-tool support.
With that power comes configuration complexity. A wrong nozzle assignment, filament mapping, firmware macro, or collision volume can invalidate a visually plausible project. Version 2.5.1 is a sensible stable starting point, but manufacturing-critical capabilities still need qualification on the actual printer with known test pieces.
Primary sources and verification
- The Next Layer video, 19 Nov 2026
- Official release notes
- Detailed feature notes
- Performance and collision volumes
- Maintenance release
- Official GitHub release
- About the creator
- Contact page
- Sponsorship media kit
- Official download
Editorial verification: November 21, 2026 | Estimated reading time: approximately 14–17 minutes. Video is about 21 minutes separately.